Easy High Key Lighting

Amanda 03.jpg

Creating high key light is making sure there is enough light on your background so it is pure white, with no shadows. This can be done using strobes or LEDs or a mixture of both types of light.

There are several ways to do this.

My favorite way to accomplish high key light is to use a softbox or an octabox as my backdrop. With this, I have my model stand in front of the softbox. I shoot a strobe through the softbox, making sure my exposure is two stops brighter than my main light. This gives me a bit of hairline light and a pure white backdrop. Any shadows or wrinkles in your softbox will be blown out and not visible.

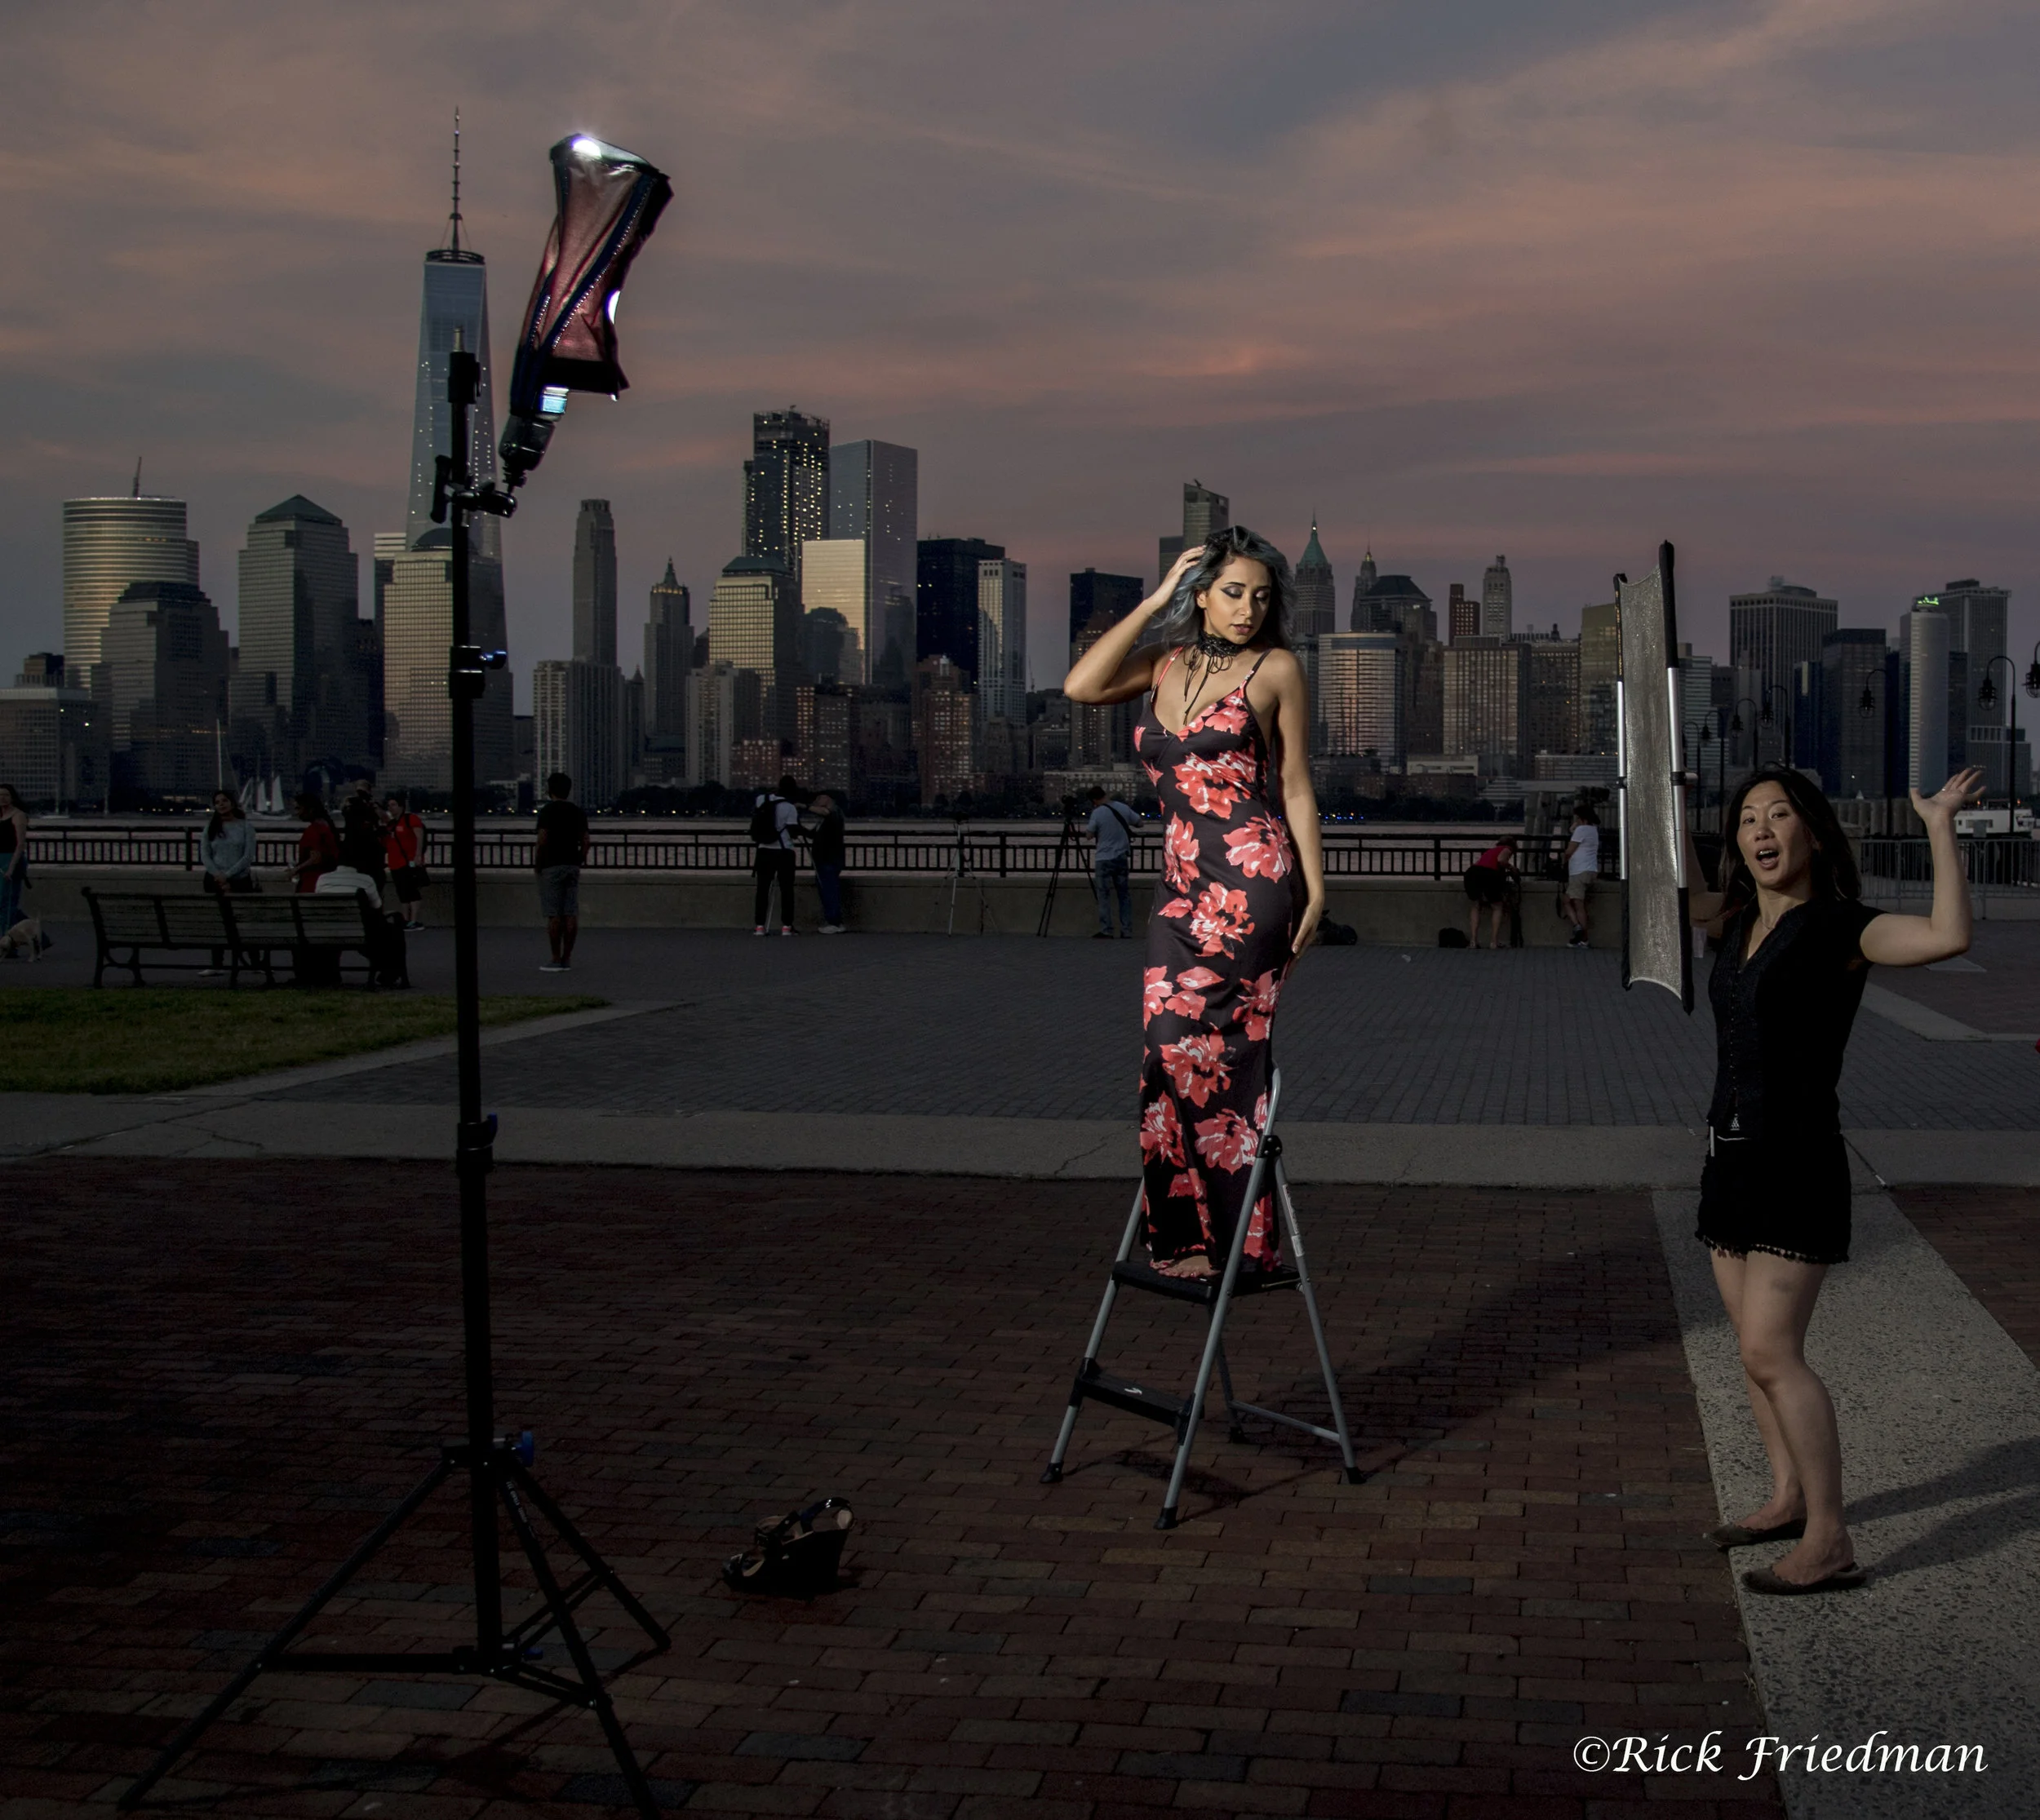
In the above photograph, shot with my Tamron 35-150mm and Nikon D850, the model is standing in front of a 53-inch octabox with a Dynalite Baja strobe. The front light is a Savage 35-inch ModMaster softbox with Dynalite flash.

Amanda 02A.jpg

Headshots with high key lighting

If you are doing headshots the 35-inch Savage ModMaster is large enough for the backlight. Savage also makes a 47-inch Beauty Dish that works great for your backdrop.

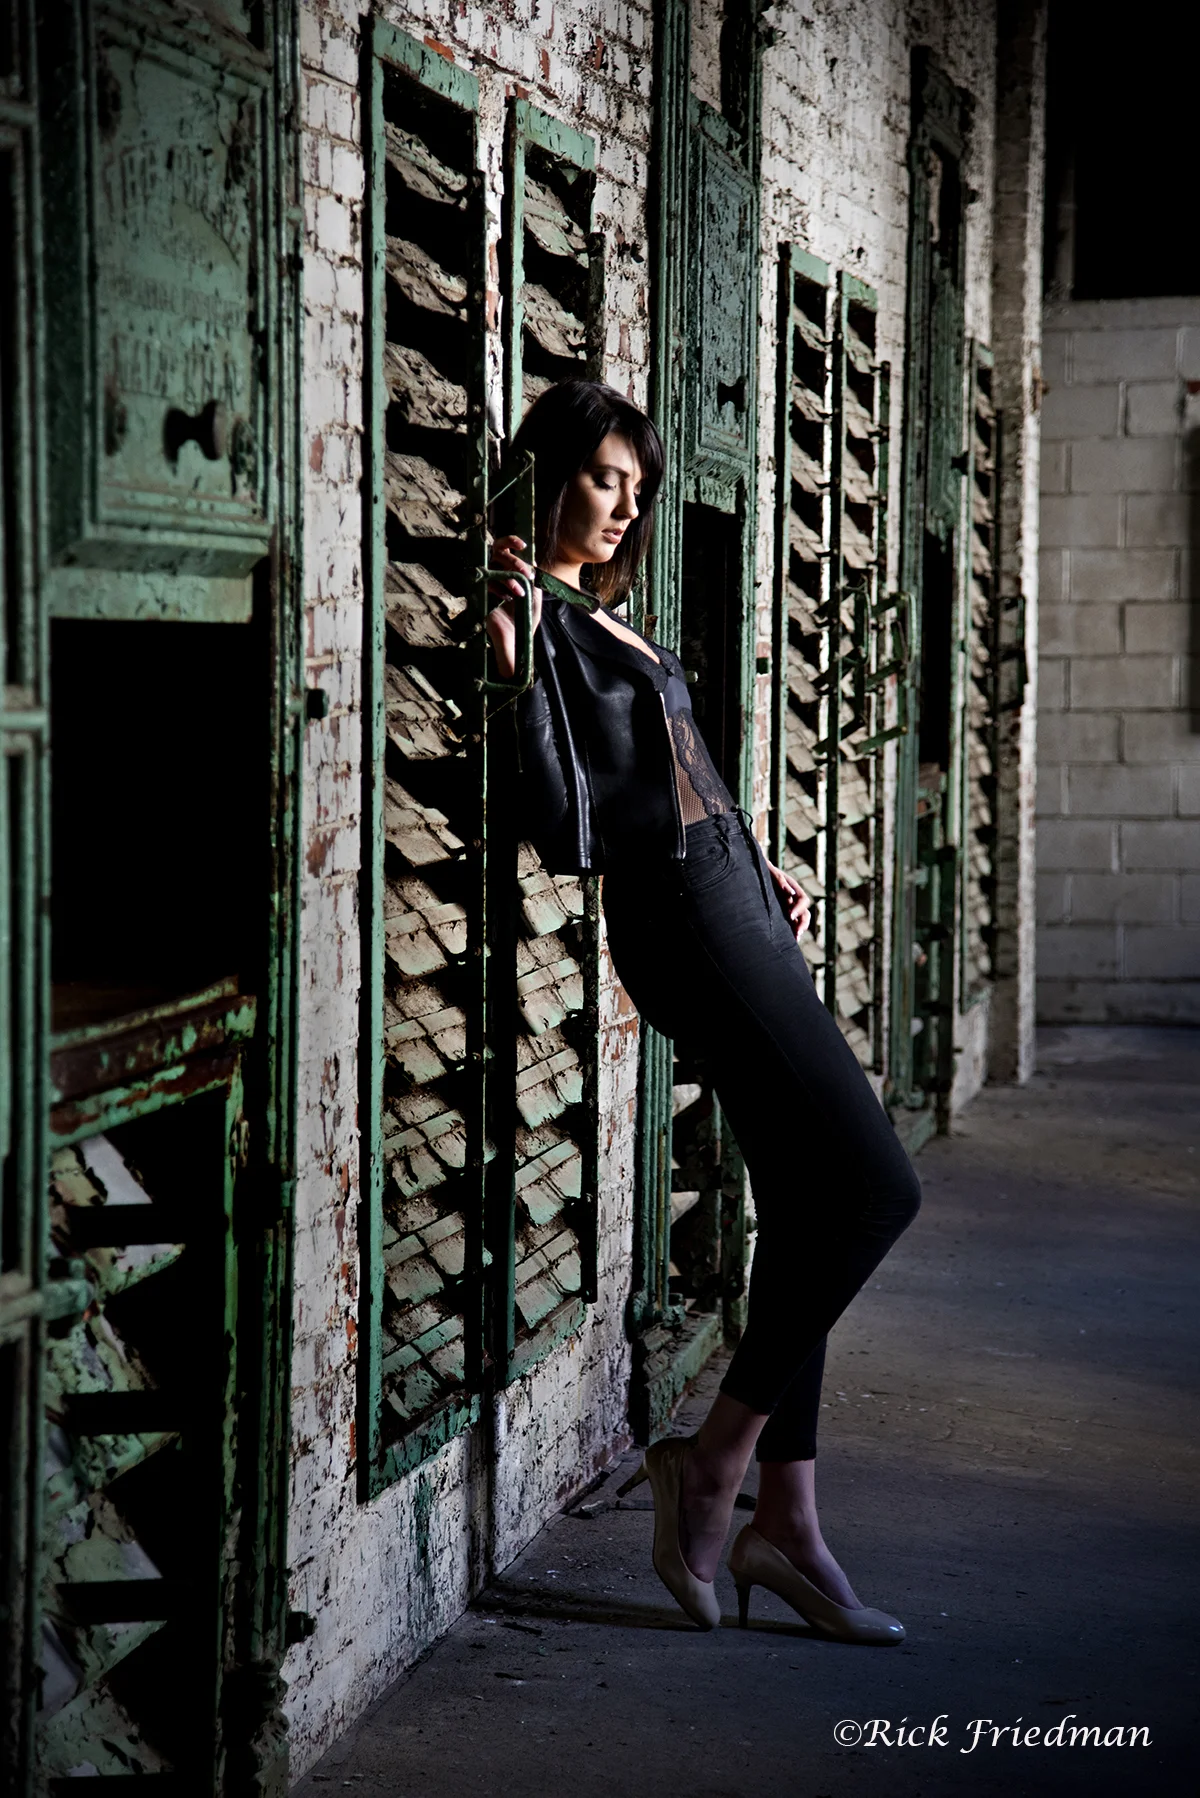
Both of these Savage light modifiers make great light, are collapsible, easy to take on location and set up in about 30 seconds. Both come with a Bowens mount and a speedlight adapter. This portrait was done with a Tamron 100-400mm lens at 400mm on a Nikon D850 camera

High Key 03jpg.jpg

In this tight shot of model Julianna Nicole, the high key back light is the Savage 35-inch ModMaster softbox with a Nissin Di700A speedlight. The front light is a Savage RGB Ring Light. This is an LED ring light, which lets you control the color and brightness with an app on your phone. In this case, I am shooting through the ring light with my Tamron 24-70mm f/2.8 G2 lens on a Nikon D850 camera. This photograph is a mixture of flash for the background and continuous light as the main light.

Julianna 07.jpg

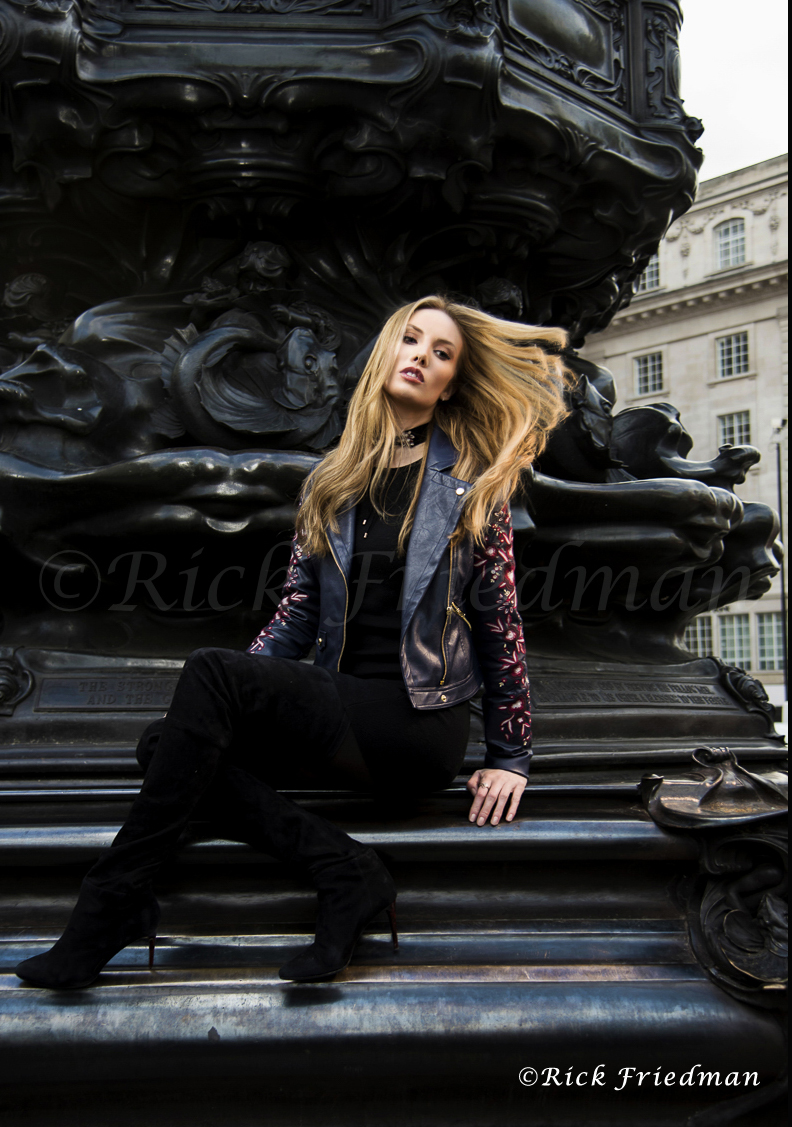
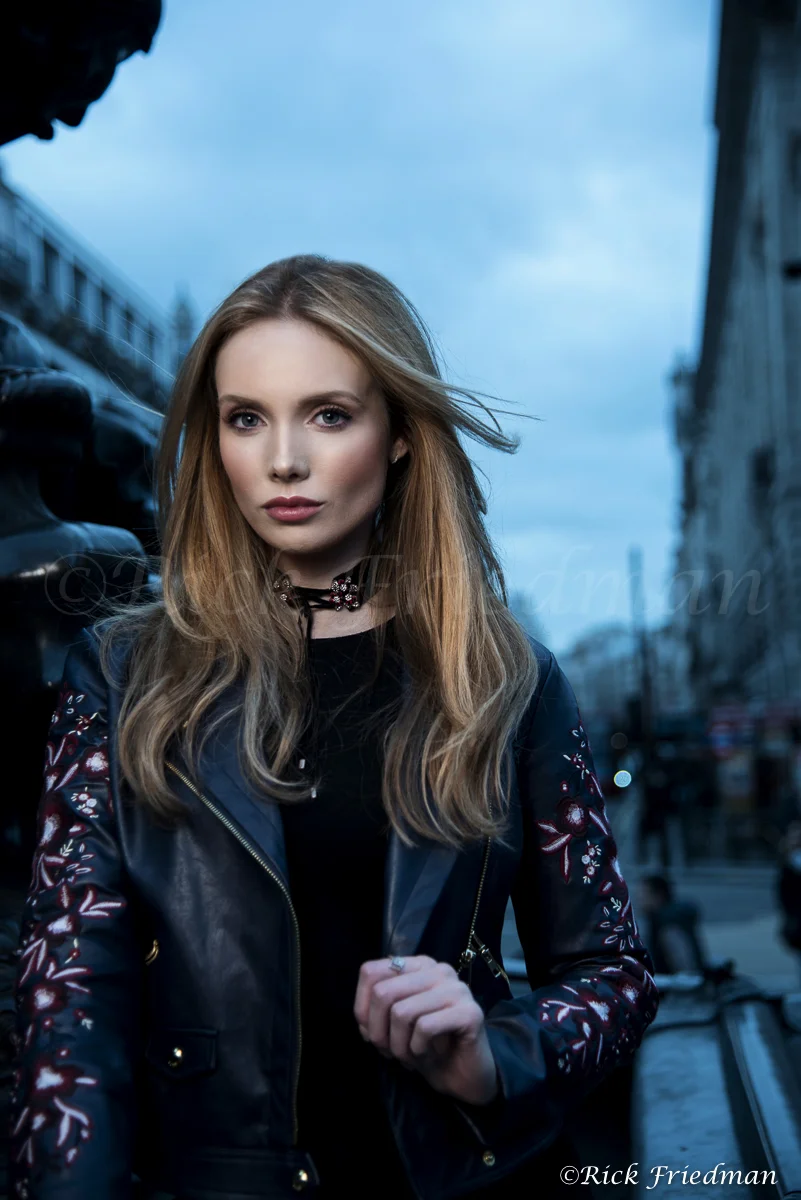
For a 3/4 length photo, I use Savage Translum as the backdrop. This is a diffusion material that comes in a roll, like a roll of backdrop paper.

I’ll shoot one or two strobes or LED lights through the Translum, again, making it two stops brighter than front light and eliminating all shadows. This gives me a perfect white high key backdrop.

A final high key suggestion

You can have your subject stand in front of a white backdrop and shoot enough light on the backdrop to blow away any shadows. When using this technique, I start with a Savage Pure White backdrop and usually add two strobe heads on each side of the backdrop. Make sure your strobes on the backdrop are not hitting your subject — I usually make half snoots out of Rosco Cinefoil. Bending the Cinefoil lets me control where my light is aimed. There are lots of other uses for Cinefoil, but that’s another article.

The Rick & Rick Show!

Be sure to join me for my upcoming workshop with Rick Ferro — it’s the Rick & Rick Show! Here, we’ll be teaching lighting and photographing models in a sea of classic cars. We’ll have a ton of equipment for you to use, and some fantastic models to photograph. The “Cars, Cameras and Models” workshop will take place at the Classic Car Museum of St. Augustine, FL at the end of May. We’ll also be exploring the beaches of St. Augustine. For more information or to sign up, contact me at rick@rickfriedman.com.

Waiting for a Bus


Tower Bridge.jpg

Tower Bridge, London, UK


Like most photographers, I’m always looking for the right location, the right angle, the perfect light and the right moment to make the photograph.
Whether I’m traveling abroad or walking around Boston, near my studio, one of my favorite times to shoot is blue hour, after the sunsets and the sky goes to cobalt blue.  The colors get richer as the sky darkens, until there is just no light left in the sky. 


I am always looking for additional element to bring my photograph to life.   Is there a building with lights that will show against the darkening sky?  With a bright sky, you will not see these lights.  It’s an exposure balancing act between the sky and the light from the buildings.  Using the in camera meter, I read the light in the sky and the light from the buildings, when the exposures match or are close, that’s when I make my photograph. I make several frames as the ambient light in the sky is changing.  The exposures become quite long.  I am working of a tripod with a shutter release connected to my camera. For the long exposures, I use the mirror up setting to eliminate camera shake and close the eye piece to prevent stray light from hitting the sensor.  If you are using a mirrorless camera there is no mirror up setting.


This photograph of Tower Bridge in London was published in “National Geographic Night Visions” as a double spread.   In a photograph like this I wait for traffic to pass by while I am making the exposure.  The headlights and tail lights add a feeling of movement and color to the image. 

The upper red streak and the yellow streaks came from a double decker bus crossing the bridge.   I shot this photograph a few years back with a Nikon D810, with a 17-35mm lens on a Induro tripod with an Acratech head.  30 seconds, f20 ISO 100.  Today I would shoot this photograph with a Nikon D850 with a Tamron 17-35 lens.


I was in London teaching my “Location Lighting Workshop” at the Societies of Wedding & Portrait Photographers Convention.  This is a wonderful annual, event, but due to Covid -19, the next Convention is scheduled for  March 16-19, 2022.


The photographs below of a bus in Piccadilly Circus was done with a Nikon 16mm fisheye, exposed for 20 seconds, f 8, ISO100.

London 02Bsm.jpg


The last photograph is also from Piccadilly Circus of traffic merging.  This was done with a 17-35 Nikon zoom at 17mm for 8 seconds, f22, ISO 80.


London04sm.jpg

I processed these photographs using Luminar AI.   

This technique of long exposure and movement can be done almost anywhere.


PhotoFocus Article: What's in the Bag- Gear I Use to Photograph President Trump

In this article, I talk about the gear I brought to photograph President Trump's visit to Manchester, New Hampshire. I had to scope out the perfect angle for when the President came on stage, and decide which equipment to actually use. This is because you only have so much space, and also don't want to weigh down your back during the long walk from after screening to the press area. 

Learn more about my assignment to photograph President Trump, here!

20180322__DSC9124.jpg

PhotoFocus Article: A Better Way to Fly

This article is all about how flying first class can actually be cheaper when you're flying with a lot of equipment. By the time you pay for an overweight bag, and a second checked bag, it is often less expensive to fly first class. 

Read more about flying first class and the different bags I take with me, here!

First-Class-Featured-Photo.jpg

Tuesday's Tips: Lighting Up the Weekend!

I had great time teaching my Location Lighting Workshop at Unique Photo in New Jersey, November 3 &4th.  

On first day, the workshop focused on speedlights.  The class began lighting with a single speedlight  on camera in different situations creating different looks.   The workshop progressed to using a multiple speedlights, light modifiers and color gels.  The first day took place inside the classroom at Unique Photo.

On Second day we moved to The Photocoop Studio in Little Falls, NJ. We worked with Hensel studio strobes, mixed Hansel strobes with Nissin flashes and added smoke from a Rosco Mini V fogger and colored gels from the "Rosco Location Lighting Kit by Rick Friedman".

Here are some of the some of the lighting situations we created during the workshop.

Juliana_0581_C1V3_Crp_RtDD3_Sh_D_Flt.jpg

ISO: 100
Aperture: 7.1
Shutter Speed: 1/13
1 Hensel with Beauty dish
2 Nissin Flash D700A
2 Rogue grids with pink and blue gels
4 Pocket Wizard Plus IV
Sekonic 478 Lightmeter

 
DSC_0590-Edit-2 copyinsta.jpg

ISO: 200  
Aperture: 8  
Shutter Speed: 2 seconds
1 Hensel with Beauty dish
2 Nissin Flash D700A
2 Rogue grids with pink and blue gels
4 Pocket Wizard Plus IV
Sekonic Lightmeter

 
DSC_0496-Edit.jpg

ISO: 100
Aperture: 4.5  
Shutter Speed: 1/200
Dynalite Baja with a deep dish reflector
Pocket Wizard Plus III
Sekonic Light Meter

 
blog uniquephoto.jpg

ISO: 100 Aperture: 4.5 Shutter Speed: 1/100
1 Hensel with Beauty dish
1 Nissin Flash Di700A
1 Rogue grids with pink gel
4 Pocket Wizard Plus IV
Sekonic Lightmeter

 
DSC_0452.jpg

ISO: 320  Aperture: 6.3  & Shutter Speed: 1/250
3 Nissin Flash Di700A
1 Nissin Air 1 transmitter
2 Rogue XL flashbenders
1 Rogue grid with blue gel

 
DSC_0483.jpg

ISO: 100 Aperture: 6.3  & Shutter speed: 1/250
3 Nissin Flash Di700A
1 Nissin Air 1 transmitter
2 Rogue XL flashbenders
1 Rogue grid with orange gel


Here is the our silly group picture! Thank you everyone for joining us!  

I used ThinkTank Photo to move all my gears.  They have great cases.   If you are interested in their products,  use my "Affiliate number" 140955.92f749 to receive a free gift. 

DSC_0544.jpg
 

Check out my upcoming workshop on my website!   

I will be teaching my Location Lighting Workshop at Xposure International Photography Festival in Sharjah, UAE on November 22 & 24.

Vaneli and I are leading a model shooting workshop on the Bahama cruise in January 5 through 8


Come Join Us!


Tuesday's Tips: "Live from New York !"

We had a great time presenting my my Location Lighting demonstrations during PhotoPlus Expo 2017 in New York!  Here are images from my ExpoImaging Rogue Flashbender live demonstration using Nissin speedlights at Unique Photo Booth.  

Both are 2 speedlights photographs with Rogue Flashbenders against the same black velvet background on a 4 foot square stage, achieving very different visual effects.


DSC_9327-EditCMYKCMYK.jpg

Main Light: Nissin Flash Di700A with Rogue Flashbender XL
Hairline light: Nissin Flash Di700A with Rogue Flashbender XL and ExpoImage purple gel
The Speedlights were trigged using a Nissin Air 1 Transmitter.
Shot with NIKON D810
ISO: 250
Aperture: 4.5
Shutter: 1/160

PPE 2017 Diagram 1.jpg

DSC_9779-EditCMYK.jpg

Main Light: Nissin Flash Di700A with Flashbender XL
Hairline light:  Nissin Flash Di700A with Rogue Grid
The Speedlights were trigged using a Nissin Air 1 Transmitter.
Shot with NIKON D810
ISO: 64
Aperture: 5
Shutter: 1/200

ppe expo tatiana behind copy.jpg

IMG_4073CMYKCMYK.jpg

Lighting Demos using Flashbenders at Unique Photo booth during the PhotoPlus Expo 2017.


NYC sm01.jpg

This is the view from my hotel room in NYC.

Now it's on my next workshop!   Location Lighting Workshop will part of the Xposure International Photography Festival in Sharjah, UAE!  Nov 22-25th.   I have an exhibit of my presidential photographs at Xposure. This is going to be great festival, come join us!

I'm kicking off 2018 Location Lighting Workshops with a Bahamas cruise and model workshop with my good friend Vanelli.  Jan. 5-8th.  This will be a lot of "Lighting and Laughing"  Join us!  More info about upcoming workshops can be find my workshop page.


Tuesday's Tips: Happy Halloween!

Happy Halloween!  Every Halloween the area around my Boston studio is filled with hundreds of trick or treaters.  I am not really sure where they all come from, but it's great fun to stand outside my studio with a bowl of candy, a camera and a strobe. 

Here are tips to shoot Halloween!

Drag the shutter!
I love shooting  photographs that are a mixture of ambient light and strobe. Start your exposure with the element you can not control, that being the available (ambient) light.  Set your camera meter on manual exposure and your strobe on TTL.  Meter off the available light and use the strobe to fill in.  Due to darkness and very little available light you will be able to hand hold your camera at a much slower shutter speed than you normally would.  That slow shutter speed enables you to record what little there is.  The speedlight will fill in where you want it. 

This is a strobe on camera camera image. I used a slow shutterspeed and moved my camera from right to left.  The Green light is from glow sticks which the kid was holding while trick or treating.  My settings for this image was 1.6 seconds,  f4 ISO 200.


Speedlight off camera!
I held my speedlight lower left.  Light coming from lower angle gives you eerily feeling, perfect for Halloween!  My camera was set on manual to read the ambient light (candle in this case) using the in-camera meter.  My exposure for this shot was  2.5 seconds, f4. ISO 200.  I used a Pocket Wizard Plus III to fire my strobe. 


Get Low!
Get low and use your foreground!  I used in the camera meter to read the  exposure from the sky.  I  held my speed light off to the left and triggered it with a Pocket Wizard Plus III.


Get High! 
Get high and use your foreground!  


Wait for dusk
Wait till dusk to start shooting!  This was strobe on camera, with the head of the strobe at a 45 degree and bounced through a cube.  


Play with focal length of your lens

Shot with a 16mm fisheye.


Shot at 50mm


007.JPG

Shot at 70mm


Don't be afraid to get close.... I'm sure they won't bite...


Happy Halloween! May everyone have a safe and fun Halloween!  

This image is from my hands-on Location Lighting Workshop! 

Come join me for lighting and laughing,  upcoming workshops info here

Tuesday's Tips "Smokin' Hot Lights"

This image from my recent Niagara Falls area "Location Lighting Workshop" with my good friend and amazing photographer Doug Hansgate.  We started the workshop using one fresnel light and progressed to the 3 light set up below.  We were going a hard light look.  The main light was on a boom from above, stage right.  We used 2 back lights to high light her hair and bring out the smoke.  One back light was directly behind our model, Becca's head and the other light was stage left, bringing additional high lights to her hair.  On stage left we had a 4'x6" white reflector.  
When you are using smoke, you need to back light the smoke to give it depth.

Equipment used:
Nikon D810 with Nikor 105 macro lens
Sekonic 478 Light Meter
Rosco Smoke Machine
3 Arri Fresnel lights
ThinkTank Photo camera cases

Settings:
ISO: 1600, Aperture: 5.6, Shutter: 1/200 

Come join me at one of my upcoming "Location Lighting Workshops"
Nov. 4-5, Unique Photo, Fairfield, NJ
Nov. 22-25  X-posure International Photo Festival,  Sharjah, UAE
Jan. 5-7  Bahamas Model Shootout & Photo Workshop with Vanelli & Friends

20170818__DSC3107 copySM.jpg
20170818__DSC3188.jpg

Tuesday's Tips: Lights, Cameras, Colors!

Guitarist and singer Ken Susi of the band “Unearth” dropped by the studio this past weekend.  Ken is an avid photographer and wanted to work Keiko and I on lighting.  We quickly volunteered him to be the model. 

We did a couple of multi light gelled set ups.

RF blog015.JPG

In the first image, we used 2 Dynalite Baja B6 strobes, one on either side, slightly behind Ken giving us the light on his face.  Both strobes had a Dynalite 20 degree, 7” grid.  The end of both grids were wrapped in Rosco Cinefoil to further control the spread of light.  On the left side we used a Rosco Medium Straw gel from my Rosco Location Lighting Kit and on the right side we used a Rosco Calcolor 30 Cyan.  Directly behind Ken’s head is a Nissin Di700A speedlight with a Rogue grid and a red gel.  Directly in front of Ken is a second Nissin Di700A speedlight with a Rogue grid.  The power to this Nissan was turned down, giving a minimal amount of white light.  To fire the strobes I used a Dynalite transmitter.  The Nissin flash was triggered by using the built in optical slave.

3 light set ups.jpg
 
 
20170902__DSC4906 copy. SM.jpg
 

The second image is lit from below with one Dyanlite Baja 6 with the 20 degree, 7” grid and wrapped in Cinefoil.  The strobe is centered just below the bottom of the frame.  The red backlight is the Nissin Di700A with the Rogue Grid and the red gel.  The prevent the light from bouncing off the white ceiling in the studio, we placed a black foam core on a Photoflex boom arm over Ken.  

Thank you for stopping by the photographic Lighting Test Kitchen, Ken! Cant wait with you more!
 

20170902__DSC1308.jpg
2light set up.jpg

All photographs where shot using a Nikon D810 and either a Nikon 105 Macro or aNikon 70-200 F2.8 with a 1.4 extender.  The gels are from the Rosco Location Lighting Kit by Rick Friedman.


Come join us at one of upcoming “Location Lighting Workshops” !

Nov. 4-5, 2017
Unique Photo, Fairfield, NJ.  2 day workshop

Nov 22-25, 2017
Exposure International Photography Festival, Sharjah, UAE

January 5-8, 2018
Lighting Workshop &Model shoot in the Bahamas with Vanelli & Friends
 

Gels and cinefoil are available from my Location Lighting Kit.

FullSizeRender.jpg

Capturing fireworks!

Happy Summer!  It’s time to capture some of the beauty in the sky above you, as we celebrate Independence Day.  
The key to capturing fireworks is timing your exposure so you can capture multiple blasts without over exposing your image.  Using a low ISO will give you longer exposures and better quality.  Your shutter speed will determine how long the trailfrom the fireworks is.  My preference is shutter speeds ranging from 4 to 15 seconds at f8 or f11.  Make sure you are shooting on manual exposure. 

Another trick is to set your camera on bulb, lock your shutter open with your cable release and hold piece of dark cardboard in front of the lens.  When a blast occurs remove the cardboard, when the blast ends, hold it in front of the lens again.  This will enable you to record multiple blasts on a single frame.


Colored fireworks will give you more vibrant trails, while white fireworks tend to over expose your image.  To eliminate camera shake, as a result of slow shutter speeds use a tripod. I also recommend using a cable release, which allows you not to touch the camera when releasing the shutter.  You can also weigh down your tripod for greater stability if it’s a windy day.  Hang your camera bag from the hook on the bottom of your trip.   For longer exposures, you want to block off the eyepiece to keep stray light form entering the back of the camera and affecting your image.  If your camera has a mirror lock up feature, you also want to use this on longer exposures. 

ISO100, F8 & 6 seconds

ISO100, F8 & 6 seconds


ISO 100,  F10 & 4 seconds.

ISO 100,  F10 & 4 seconds.


The photo below is from the end of the summer frieworks in Oak Bluffs, on Martha’s Vineyard.  I was part of the White House Press Pool covering President Obama’s summer vacation.  While we were on hold as the President was at a private event, I noticed the fireworks over the harbor.  I did not have a tripod with me, nor a cable release (not items you usually need in the White House Press Pool). I propped my camera on a fence post and gently touched the shutter.  Rules are only guidelines, you can photograph fireworks without a tripod! ( although not ideal.) You just need to be flexible and creative with your methods.


Happy Summer Shooting!! Hope to see you at my upcoming Niagara area workshop with Doug Hansgate, August 18-20Rick Friedman & Doug Hansgate Lighting Workshop


Tuesday's Tips: CamAm Photo Expo

I just returned from a wonderful time at  the CanAm Photo Expo in Baffolo, NY.  This is one of my all-time favorite photo festivals,  If you were not with us at the Expo, come join us next year in Niagra Falls, Canada.
This year I taught 2 Location Lighting Workshops, one on USS Little Rock and one at Silo City, along with 2 indoor studio workshops and 1 lecture.

I will be back in Buffalo on April 21-23 to teach a 3 day location & studio photography workshop and post production classes with Doug Hansgate.   Doug and I are also teaching the workshop in Boston, May 26-28th. 
For other  upcoming workshops, please check out my workshop page.

Silo City

Silo City

Silo City Workshop  

Silo City Workshop 


USS Little Rock 

USS Little Rock


Studio Lighting 

Studio Lighting


I had honor co teaching the workshop in Silo City with great photographers, Tony Corbell, Dana Norlund. 

I had honor co teaching the workshop in Silo City with great photographers, Tony Corbell, Dana Norlund.


Silly group photograph from USS Little Rock Location Lighting Workshop. 

Silly group photograph from USS Little Rock Location Lighting Workshop.


Unique Photo Location Lighting Workshop Feb 25, 2017

We had a great workshops at Unique Photo, Fairfield NJ last weekend.  My workshops are a mixture of lighting, shooting, creating and sharing ideas.  Everyone gets to shoot every situation, working  with speedlights, studio strobes, light modifiers and color gels.   Unusual spring weather in NJ let us shoot outdoor and indoor!  

Here is a recap of the workshop!

Equipment used during the workshop:
Elinchrom ELB Qudra strobe
Nissin Di700A speedlight & Nissin transmitter
Dynalite Baja strobes
Rogue Flash Benders
Rogue Grid set
Chimera Lighting Light modifier
Sekonic Lightmeter
Pocket Wizard
Rick Friedman Location Lighting Kit by Rosco

I'm teaching a 1 day workshop in Boston on March 8 at Boston Center for Adult Education and Herwin Camera in NYC on March 25!  For the full workshops schedule, please visit www.rickfriedman.com. Hope you can join us!

Thank you everyone for joining us at Unique Photo! Happy Lighting!

Tuesday's Tips: Lighting London

This series of photographs is from my one day workshop "Lighting Goes on Location in London", part of The Societies of Photographer's Convention last month.

The group spent the day shooting in Piccadilly, Chinatown and Soho.  We used several different portable lighting kits, and rarely used light stands!  

Equipment & settings under each photograph.1 Nissin Di700A SpeedlightWestcott Rapid BoxPocketWizard Plus IVISO: 100Aperture: 4Shutter: 1/250

Equipment & settings under each photograph.
1 Nissin Di700A Speedlight
Westcott Rapid Box
PocketWizard Plus IV
ISO: 100
Aperture: 4
Shutter: 1/250

1 Nissin Di700A SpeedlightWestcott Rapid BoxPocketWizard Plus IVISO: 125Aperture: 4Shutter: 1/125

1 Nissin Di700A Speedlight
Westcott Rapid Box
PocketWizard Plus IV
ISO: 125
Aperture: 4
Shutter: 1/125

1 Nissin Di700A SpeedlightWestcott Rapid BoxPocketWizard Plus IVCrossfiltering with Rosco CTO gel.ISO 64Aperture: 4Shutterspeed: 1/250

1 Nissin Di700A Speedlight
Westcott Rapid Box
PocketWizard Plus IV
Crossfiltering with Rosco CTO gel.
ISO 64
Aperture: 4
Shutterspeed: 1/250

2 Nissin Di700A Speedlight2  Flashbender XLPocketWizard Plus IVISO: 100Aperture: 4Shutter: 1/100

2 Nissin Di700A Speedlight
2  Flashbender XL
PocketWizard Plus IV
ISO: 100
Aperture: 4
Shutter: 1/100

1 Elinchrom ELB strobe with a Pro headRotalux Softbox Deep Octa 70cmSkyport transmitterISO: 160Aperture: 5.6Shutter: 1/100

1 Elinchrom ELB strobe with a Pro head
Rotalux Softbox Deep Octa 70cm
Skyport transmitter
ISO: 160
Aperture: 5.6
Shutter: 1/100

1 Westcott Ice light 2ISO: 64Aperture: 5Shutter: 1/250

1 Westcott Ice light 2
ISO: 64
Aperture: 5
Shutter: 1/250

3 Nissen Speedlights,  2 Rogue FlashBender XL4 PocketWizard Plus IVRogue grid shot thru Rosco Cinifoil pattern from Rosco Rick Friedman Location Lighting KitISO: 64Aperture: 5Shutter: 1/250

3 Nissen Speedlights,  
2 Rogue FlashBender XL
4 PocketWizard Plus IV
Rogue grid shot thru Rosco Cinifoil pattern from Rosco Rick Friedman Location Lighting Kit
ISO: 64
Aperture: 5
Shutter: 1/250

Rogue ReflectorISO: 800Aperture: 4Shutter: 1/100

Rogue Reflector
ISO: 800
Aperture: 4
Shutter: 1/100

1 Nissan Di700A SpeedlightWestcott Rapid BoxPocketWizard Plus IVISO: 200Aperture: 4Shutter: 1/50

1 Nissan Di700A Speedlight
Westcott Rapid Box
PocketWizard Plus IV
ISO: 200
Aperture: 4
Shutter: 1/50

1 Nissan Di700A SpeedlightWestcott Rapid BoxPocketWizard Plus IVISO: 100Aperture: 4Shutter: 1/13

1 Nissan Di700A Speedlight
Westcott Rapid Box
PocketWizard Plus IV
ISO: 100
Aperture: 4
Shutter: 1/13

Most of the time the attendees photographed the models.  I took a few minutes at each location to demonstrate my lighting and shooting style. .  We started at 10 o'clock, with a  lunch stop at the pub between, we finished shooting after 5 o'clock!  All my images were shot on a Nikon D810 with a 24-120.  My camera was set Manual for all the photographs, lights were read using Sekonic light meter.

Come join me at one of my upcoming workshops.  Lots of lighting and laughing!

This spring, I am teaching Unique Photo (NJ), Boston Center for Adult Education CenterHarwin Camera (NYC), Cardinal Camera (Philadelphia & Charlotte NC) CanAM Photo Festival and Pixel Connection (Avon, OH).  I will be back in the UK for a series of workshops this summer.   Please visit my workshop page to see a complete schedule.

Tuesday's Tips: A Slice of Orange!

I always carry a slice of orange in my camera bag.  Don't you?  

You do realize I am talking about an orange gel, better known as a CTO, (Color Temperature Orange). Similar to the other orange, this orange has several uses.

It’s amazing what a little orange can do!  You can bring out high lights in your subject’s hair and change gray skies to blue.

This photograph was shot during a lighting demo at Photo Plus 2016 in New York.  The main light was Dynalite Baja B6 with a Dynalite Grand Softbox. The hairline light was a Dynalite Baja B4 with a 20 degree grid with a Rosco CTO color gel. The shooting space was about 10 ft x 7 ft., proving you can work in a really small space!   Main light was about 2.5 feet from the mode while the backlight was about 2 feet behind.  The orange light give her a halo!  I used the Dynalite Baja dedicated transmitter to fire the strobes and a Sekonic L478DR light meter to read my light.


This photograph was shot during my Location Lighting UK Tour sponsored by SWPP. (I'll be leading 3bworkshops at their convention in London this January).  So... It was a rainy grey day in Caerphilly, Wales, UK, what are the odds?  Have you ever set your camera on tungsten and gone outside to shoot? What happens? Your photograph turns out blue!  So use this to your advantage on a cloudy day. Set your camera white balance to tungsten, and place a Rosco CTO orange filter over the flash. A CTO filter is a color correction filter, converting your speed light, which is balanced for daylight, to tungsten. You color correct the skin tones of your subject while your background turns blue.

The model is lit by a speedlight with a CTO gel in front of it, shot through a soft box on the right side, with a reflector on the left.  The output of the speedlight is tungsten, which matches my camera setting.  Because of this, the model has proper skin tones and the background is now blue.  To determine the exposure, the camera is set on manual and use your camera meter to read the "Element you cannot control":  In this case it is the ambient light on background.  


Rosco CTO gels and Cinefoil, along with 22 other gels are included in my "Rosco Location Lighting Kit" (wink wink!) 


Here is my upcoming workshop schedule for the next a few months.  Come join us!

December 9-11, 2016
New Jersey Camera Show at Unique Photo

January 11-14, 2017
SWPP Convention in London, UK

January 28, 2017
Location Lighting Workshop at Unique Workshop

February 7-9, 2017
WPPI, Las Vegas

March 4, 2017
Boston Center for Adult Education

March 25, 2017
Harwin Camera, New York City

March 31-April 2
CanAm Photo Expo, Buffalo, NY


This week it's about Thursday: Happy Thanksgiving!

This is the season of giving.  A great time to be thankful for what we have.  I feel that we need this grace especially this year...

For over 20 years I have spent my Thanksgiving volunteering with my camera at Pine Street Inn, New England's largest homeless shelter.  Pine St. Inn is a place where Thanksgiving has meaning, for those serving and those being served.  Imagine making Thanksgiving dinner of 1500 guests.  The folks at Pine St. do it every year!  This season is a lot harder for people who don't have family members close by and this makes it so much better.  Each year there are many new faces and many of the same faces on both sides of the tables.

 I wish everyone a wonderful Thanksgiving!